First Steps With JNote
In this tutorial, you will learn how to to the most basic stuff with JNote. For help regarding installation, please read The Getting Started Guide.
Using JNote
To start using JNote, fire it up by double clicking JNote.exe (Windows) or JNote.app (Mac).
On Linux, execute path/to/JNote/JNote in the Terminal. Example - ~/opt/JNote/JNote.
After successfully starting JNote, you will see the JNote GUI (see below).
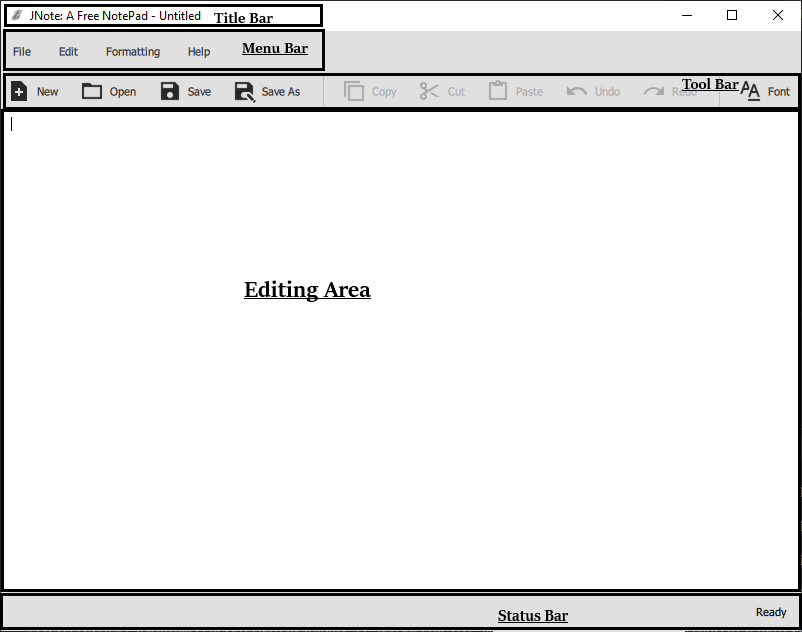
Step 1: Create a New Document
To use JNote properly, you should create a new document. You can do so by clicking ‘File’ and then ‘New` in the Menu Bar, or clicking ‘New’ in the Tool Bar, or simply pressing Ctrl + N! For more about keyboard shortcuts, see Keyboard Shortcuts.
After successfully creating a new document, the Editing Area empties (if there were any text inside) and the message “New Document Created” appears in the Status Bar. Now you can type any text you want! Let’s type “Hello!!”.
See the Docs for this feature.
Step 2: Save your work
For this example we will create a new folder called JNote-Example in your Documents folder.
You can find the Documents folder in ~/Documents for Mac and Linux, and C:\Users\username\Documents for Windows.
After editing the new document you just created, you can save it in a new file by clicking ‘File’ and then ‘Save as’, or just click ‘Save as’ in the Tool Bar. You can also press Ctrl + Shift + S.
Then a File Dialog appears asking you to choose a location and a filename for your file.
Choose the JNote-Example folder and type myfile.txt for the filename.
Finally, Hit Save!
A file with the name myfile.txt should appear in the JNote-Examples folder.
See the Docs for this feature.
Step 3: Closing JNote
Now that we have done enough with JNote, we have to close it. You can do so by clicking the ‘×’ button in the Title Bar, or click ‘File’ and then ‘Exit’ in the Menu Bar.
All Features
Now that you know the most basic features of JNote, check out All the Features